Handplane Restoration
One of the tools commonly used for wood working is the handplane. These come in a variety of sizes from only a few inches long to 60cm monsters weighing several kilos. Their purpose is to level and straighten wood and prepare it for jointing. It’s generally thought that some of the best are actually old vintage models made by Stanley or Bailey. These are readily available used and usually have plenty of life left in them. Once you clean them up that is.
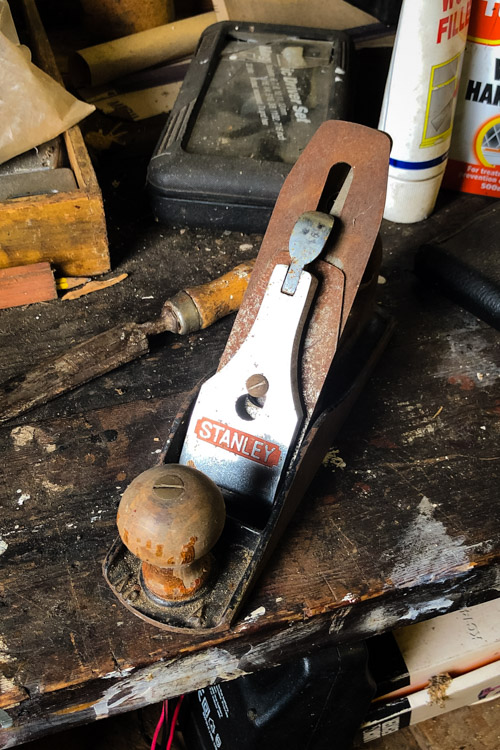
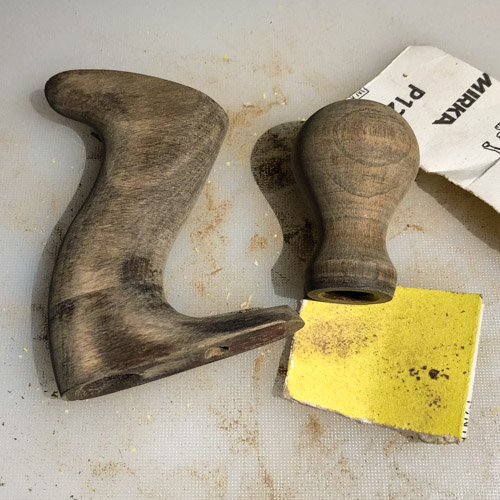
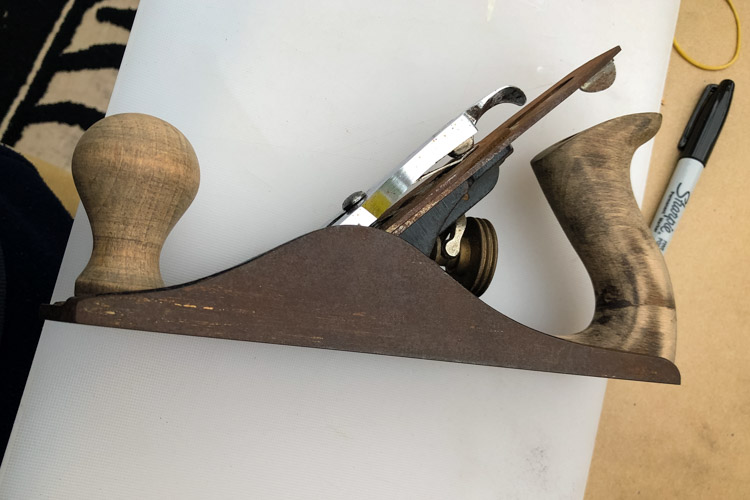
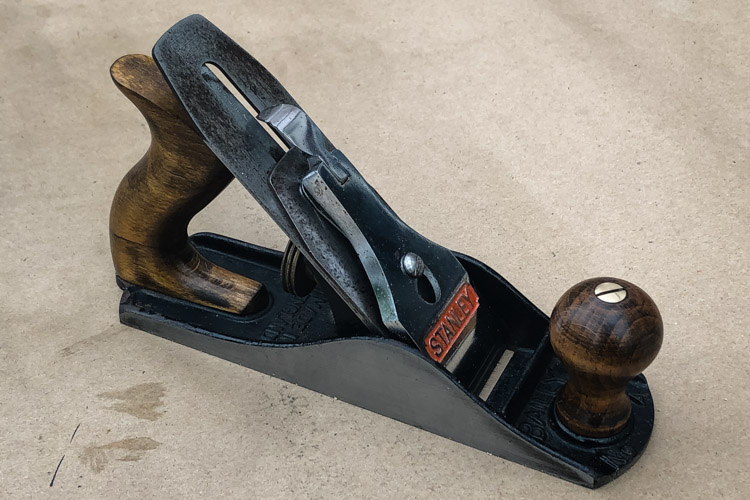
This was my Dads plane. It’s a Stanley number 4, which is a middle size and a very handy one to have. It also had seen better days. The rear handle (called the tote) was broken, the metal work was all very rusted and the finish on the handles was flaking badly. It was time to restore it for use in some projects I have in mind for the future.
The first thing I did was to date the plane. There’s no specific reason for this but I felt it wise just in case this was older or rarer than I suspected it was. Using an online tool I was able to age the plane to be a type 19 from between 1948-1961. This ties in roughly to when my dad most likely would have bought it.
It’s worth noting at this point none of this was being done blind. This is a very common thing to do so there are lots of vidoes on YouTube. I mainly used 2: One by Rag and Bone Brown, and another by Paul Sellers. Though these were far from the only ones I watched.

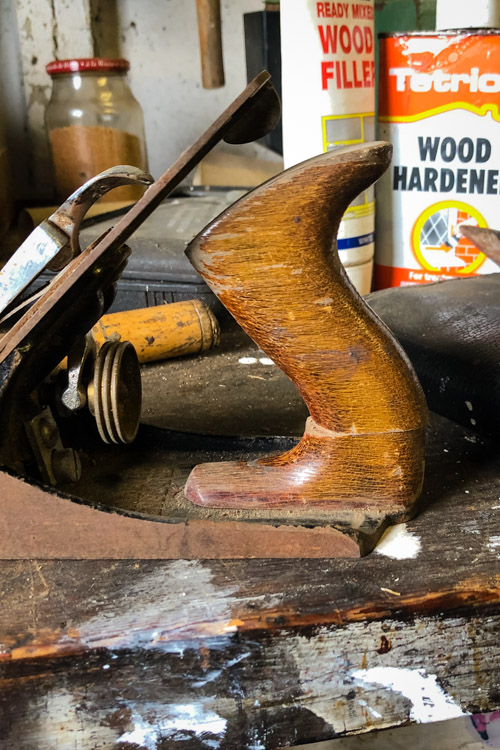
The restoration began by taking the whole thing apart. This only needs a single large flat blade screw driver and doesn’t take long. It was at this point I realised the tote was actually glued out of alignment. This made removing it very tricky as it was pinching the threaded rod. A bit of brute force eventually got it free with minimal damage to the wood.
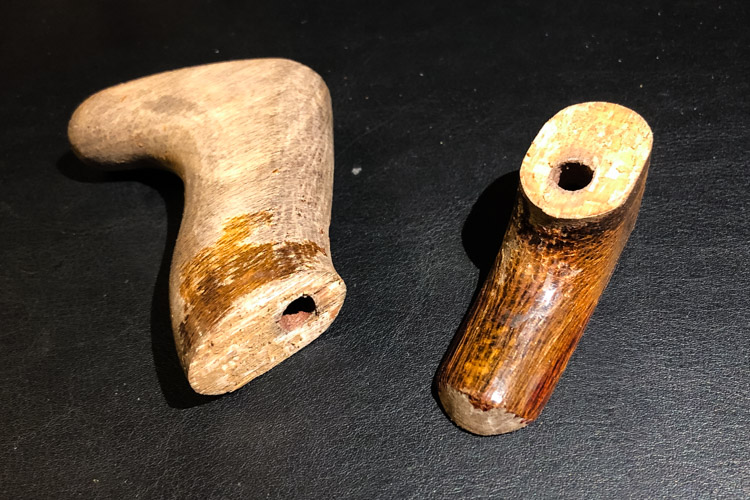
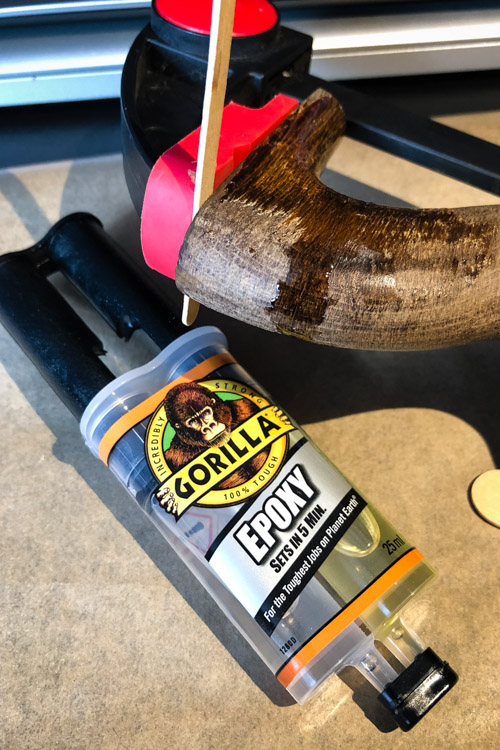
To do the job as best as I could I decided to re-break the handle at the glue join. Fortunately the glue wasn’t very good and simply sliding in a pallette knife returned it to two pieces. The glue was cleaned up as best as I could with a combination of Isopropyl Alcohol, Acetone 1 and a wire brush. I wanted to avoid sanding to try and keep as much of the wood as possible. To re-assemble the tote I decided to use expoxy rather than wood glue. This was due to the break not lining up as well as I’d like so expoxy would fill any gaps well but remain strong over time. After a few dry runs I mixed up some 5 minute epoxy, clamped up the handle and left it over night to cure.
With the tote repaired it, and the front knob were sanded. First with 120 grit Mirka Alox2, then with some 3M Sandblaster 150 grit. A final buff was done with some green scotch brite (about a 600 grit). During the 120 stage I removed the excess glue, and blended the seam to give a nice smooth comfortable grip, this also removed all the remaining old finish. A small amount of stain was still left on the tote but I didn’t want to sand away too much material so I left it, it’s now ‘character’.
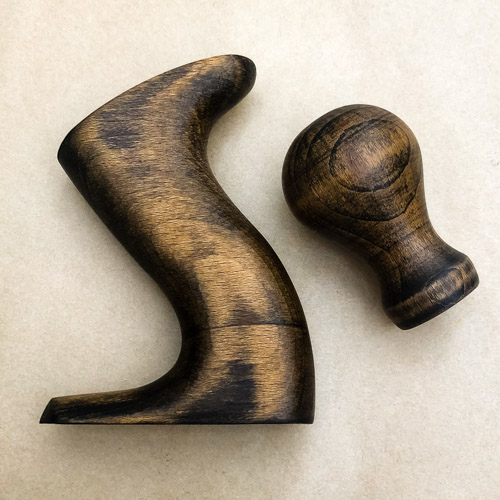
To finish up work on the wooden parts I needed some finish. I was able to ask Ben Crowe of Crimson Guitars, and horder of vintage tools, what to use. He recomended shellac. As I was in a hurry to get the job finished I went to wilko and started reading bottles/cans. Turns out that Colron French Polish is 100% shellac so I just went with that. This was rubbed in several thin coats using blue shop towels from Costco. The polish has a yellow brown tone to it and after 5 or 6 coats it gave a nice brown tone to the wood. After the 3rd coat the handles were rubbed with some fine wire wool to remove any runs and dust in the finish, and again after the final coat which left a nice smooth end result.
Attention was then turned to the plane it’s self. From research the first job is to flatten the sole of the plane. This is a reasonably simple job. First the using a sharpie some lines are drawn on the sole so we can see how our work flattening is progressing.
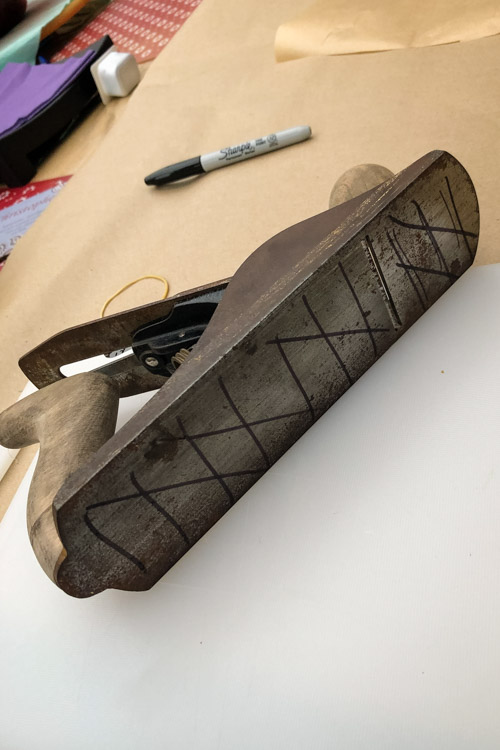
Next a length of 120 grit, the same Mirka I used before, was put onto a flat surface. I used a sheet of glass I have, but as it’s not very thick I backed it up with a chopping board for support. The plane is then run back and forth on the sandpaper, the glass keeps the paper perfectly flat and so long as you keep even pressure you get a nice flat sole.
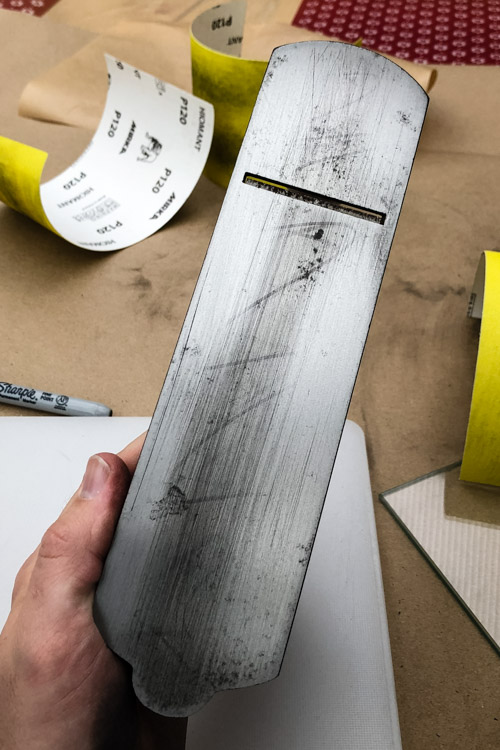
After a few cycles of this I was getting 95% of the sharpie removed after a stroke or two. For the work I will be doing this will be good enough and saves me a lot of work removing a lot of material for no reason. If I ended up doing finer work I can re-do this step, further the sole will wear in use anyway and so this is a periodic maintenance task anyway.
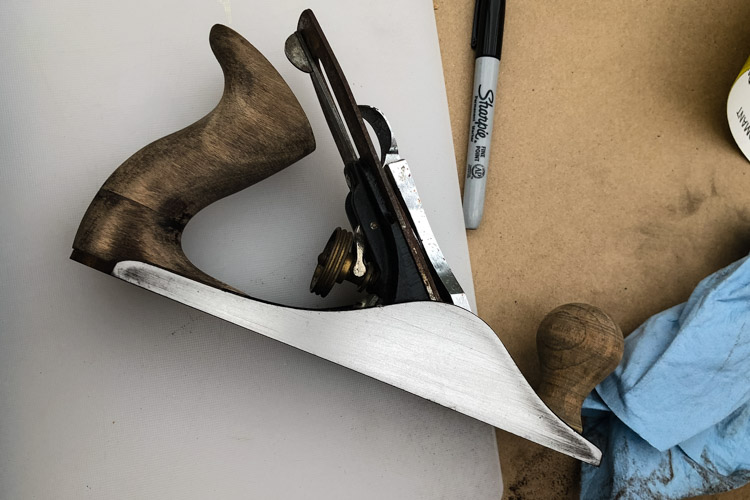
The sides are done in the same way but these started in a far worse state! There’s no need to worry about getting or keeping the base square to the sides. If you need to use a shooting board then you can adjust the cutting blade square with the planes adjustment.
Further cleaning was done to all the other flat surfaces but far less work was needed. More of a clean than a smoothing. The lever arm was rubbed clean with some wire wool and a wire brush and the painted areas of teh casting generally cleaned. Essentially this leaves you as done on the main work.
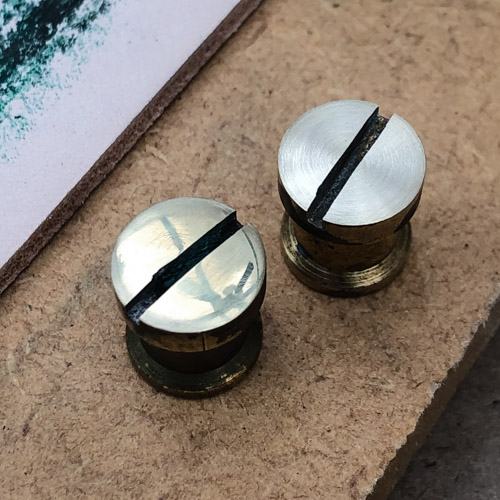
Before assembling I decided to smooth and polish the brass nuts for the handles. To do this I took the shorter front bolt and chucked it into a drill. With the nut screwed on each was sanded with grits from 120, 150, 240, 320, 400, 600, 800 & 1200. This gave a quite nice satin finish. To get the final polished result I used my leather strop charged with green compound. A few quick rubs was all it took to get a pretty decent polish.

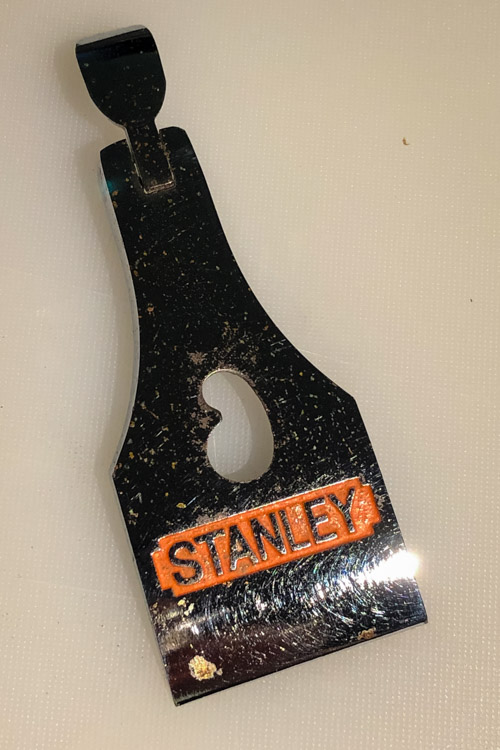
The lever cap was a quick job. A couple of quick passes with some autosol on a blue cloth gave a nice result. The pitting in the chrome is unfixable so I didn’t spend a huge effort on this.
This essentially gave me a completed plane. The final job was to clean and sharpen the blade, and it’s chip breaker.
For these parts I used a combo of wire wool and WD-40 to remove as much rust as I could. On the blade I also used the 120 on glass technique to remove a bit more and flatten it down.
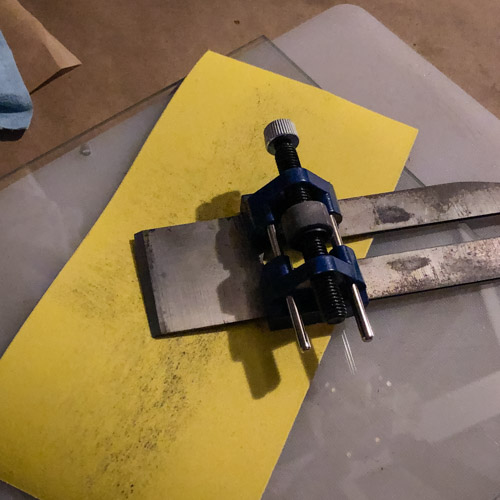
Sharpening was done using a bit of a poor mans method using sandpaper rather than proper sharpening stones. With the iron mounted in a Honing Guide to help keep it square it was slowly taken from a chipped dull blade to a blade capable of shaving, just about. As the blade was out of square and chipped a lot of time was spent going through several sheets of 120. The blade is hardened steel so it wears out the paper very quickly, even after a few strokes you can tell it’s already dulling. Once the bulk removal was done and the blade square with the chips removed I removed the guide and flattened the back. This will mean we can get a nice sharp blade later. Essentially, on the glass again, a light sanding with even pressure from 120 though 1200 ensuring you can see the back is smooth and polished all along the cutting edge. Then back into the guide again to sharpen the beveled edge in the same way. Finally a quick trip to the strop, for both the back and bevel edge, gave a nice sharp cutting blade.
And with that the restoration was complete. A few quick tests on some wood shows I did a pretty reasonable job, not perfect but usable. My sharpening skills certainly leave a lot to be desired but it cuts clean enough for DIY work, though it may need some work before I use it to build anything needing more fine skills. To ensure I don’t need to keep doing this I have coated all bare Iron with some 3-in-1 oil and put the plane into a zip lock bag to keep water away.
Hopefully this tool will now last another life time of service, it’s got plenty of life left in it.
-
Not a mix, seperate aplications to try removing the glue. Probably also worth noting these melted the finish a little which made removing it later a bit harder as it was no longer flakey. ↩
-
I wish I’d descovered branded sandpaper sooner. It cuts better, lasts longer and gives a better finish doing it. ↩